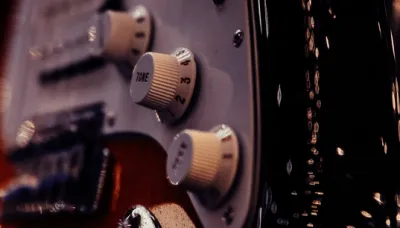
Your amp sounds huge in the room, then thin and lifeless the moment you play back the recording. New gear feels like the answer, so you eye another electric guitar setup or a fancier mic.
It rarely is. Slapping a mic in front of the guitar amp and hitting record loses most of what you heard in the room.
What you move instead is the mic. Where it sits and how you angle it against the speaker cone is what separates a full tone from a muddy one.
This guide walks through that placement step by step, so let’s start with why position beats gear.
Why Mic Placement Matters More Than Gear
It’s tempting to think a better microphone is the shortcut to a better recorded tone. In reality, placement does most of the heavy lifting.
Move a mic an inch across the speaker cone and the difference is bigger than swapping between two quality mics in the same spot.
The reason is simple physics. A guitar speaker isn’t a single point of sound.
The center of the cone produces bright, aggressive high frequencies, while the outer edge rolls off the treble and gets warmer and rounder. Distance from the grille changes how much low end and room you pick up.
Get those two variables right and an inexpensive mic will sound great.
So before you spend money on gear, spend time on positioning. The steps below walk through each variable in the order that matters.
Choose the Right Type of Mic
You’ve three broad options, and each suits a different situation.
- Dynamic mics are the standard for amps. They handle the high sound pressure of a cranked cab without distorting, they reject room bleed, and they’re durable. The Shure SM57 is the classic choice and lives in front of more amps than any other mic.
- Large-diaphragm dynamics like the Sennheiser MD 421 give you extra low-end control and headroom when an amp gets genuinely loud.
- Condenser mics capture more detail and air, which is great as a room mic or for clean tones, but they need phantom power and careful placement and can overload on a loud cab.
For most players, a single cardioid dynamic close to the grille is all you need to start. If you want a deeper breakdown of models, our guide to the best microphones for guitar amps compares the leading options.
Find the Right Speaker in the Cab
If you’re recording a 2x12 or 4x12 cabinet, not every speaker sounds identical. Manufacturing tolerances and break-in mean one speaker often sounds a little fuller or smoother than the others.
Before you commit, put your ear a few inches from each speaker while you play and listen for the one with the best balance of warmth and clarity. Mic that one.
On a single-speaker combo this step is automatic, but on a multi-speaker cab it’s an easy win most people skip.
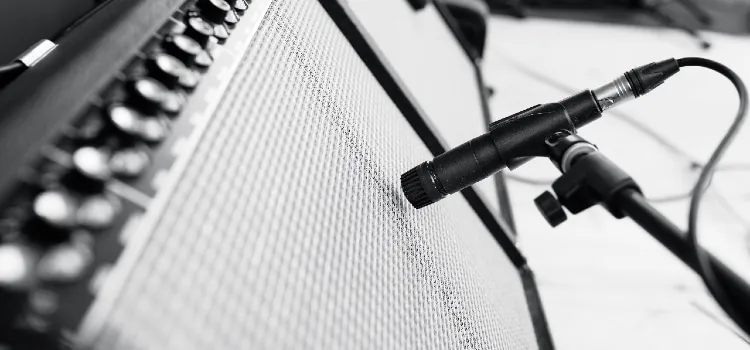
Step 1: Set the Distance From the Grille
Start with the mic close, almost touching the grille cloth, within an inch or two of the speaker. A close mic gives you a tight, focused, present tone with strong low end and almost no room sound.
This is the workhorse position for tracking and for live stages.
As you pull the mic back, you trade focus for air and room ambience. At six to twelve inches you start to blend in the natural sound of the cab interacting with the room, which can feel more open but also picks up reflections you may not want.
Begin close, then move back only if the tone feels too boxed in.
Step 2: Position the Mic on the Cone
This is the single most powerful tone control you’ve. Picture the speaker as a target: a small dust cap in the center surrounded by the wider cone.
- Aim at the center of the cone for the brightest, most cutting, and most aggressive tone. Great for clean parts and for cutting through a dense mix.
- Aim toward the outer edge for a warmer, darker, smoother sound with less harshness. Good for taming a bright amp or a fizzy high-gain tone.
- Aim halfway between center and edge for a balanced starting point that works for most styles.
Slide the mic across that path while someone plays and you’ll hear the tone shift from bright to dark. Stop where it sounds right in context.
Step 3: Angle the Mic for Tone
Once distance and cone position are set, the angle of the mic adds a final layer of control.
Pointing the mic straight on, perpendicular to the grille, gives the brightest and most direct sound. Tilting it off-axis, so it points at the speaker at an angle, naturally softens the high end and reduces harshness without having to move it all the way to the cone edge.
Off-axis placement is a favorite trick for taming an amp that sounds too bright on-axis while keeping the mic near the center of the cone.
Step 4: Set Your Levels and Avoid Distortion
A cranked guitar amp is loud, and that can overload your mic preamp or interface long before the meters look obviously wrong. Before you record, play the loudest part of your performance and watch your input levels.
Aim for healthy levels that peak well below the red, leaving a few decibels of headroom for accidental spikes. If you hear crackling or harsh clipping that isn’t coming from the amp itself, turn down the input gain on your interface, not the amp, since the amp setting is part of your tone.
A dynamic mic helps here because it tolerates high sound pressure far better than a sensitive condenser.
Adding a Room Mic for Depth
Once your close mic sounds great on its own, you can add a second mic to capture the room and create a bigger, three-dimensional sound. This step is optional and only worth doing once the close mic is dialed in.
Place a condenser a few feet back from the amp to pick up the natural ambience of the space. When you blend it with the close mic, watch for phase issues: if the combined sound gets thin or hollow, the two mics are fighting each other.
Nudge the room mic forward or back, or flip the phase on one channel, until the low end fills back in. Blend the room mic underneath the close mic to taste rather than at equal volume.
Common Micing Mistakes to Avoid
A few habits trip up most people the first time they mic an amp:
- Recording at low volume. A tube amp needs to be pushed to sound its best. Get the amp tone right in the room first, then mic it.
- Setting and forgetting the mic. A one-inch move changes everything. Always audition a few positions before you commit.
- Ignoring the room. A live mic picks up reflections from hard walls and floors. A close mic minimizes this, but a reflective room can still color the sound.
- Not taking notes. When you find a great position, measure it and write it down so you can recreate the tone on the next session.
Frequently Asked Questions
How far should a mic be from a guitar amp?
For a focused, present tone, start with the mic almost touching the grille, within one to two inches of the speaker. Pull it back to six to twelve inches only when you want to blend in more room ambience and a more open sound.
Closer placement gives more low end and less room, while greater distance adds air at the cost of focus.
Can you mic a guitar amp with a condenser mic?
Yes, but with care. A large-diaphragm condenser captures more detail and air, which suits clean tones and room miking.
The catch is that condensers are sensitive and can overload on a loud, cranked cab, so use the mic’s pad if it has one and keep an eye on your levels. Many engineers pair a close dynamic with a condenser farther back to get the best of both.
Should you mic the front or back of an amp?
The front, at the speaker grille, is the standard and gives you the most direct, usable tone. Open-back cabinets do project some sound from the rear, and a back mic can capture extra low end and a different character.
If you try a rear mic, you’ll usually need to flip its phase when blending it with a front mic so the two don’t cancel each other out.
Do you need two mics to record a guitar amp?
No. A single cardioid dynamic close to the grille produces professional results and is all most players ever need.
A second mic, usually a room condenser, adds depth and dimension, but it also introduces phase considerations and more setup.
Get one mic sounding great first, then add a second only if you want a bigger sound.
Final Thoughts
Micing a guitar amp comes down to a handful of repeatable choices: pick a dynamic mic, get the amp loud, place the mic close to the grille, and slide it across the cone until the tone sounds right. Angle and distance let you fine-tune from there, and a room mic adds depth once the close mic is solid.
The mic matters less than where you put it, so take the time to audition a few positions and write down what works. Pair careful placement with a tone you already love in the room, and your recordings will finally sound as good as your playing.