From the outside a guitar cab is just a wooden box. Start cutting panels and you find out how much the joints and bracing decide whether it holds together at volume.
That’s why this is a patient project, not a weekend rush. It also runs far smoother when every tool you need is already on the bench.
This guide breaks the build into nine steps, ending with a speaker mounted so solidly it won’t shift no matter how hard you push the amp. Get the tool list sorted first.
Here’s everything you’ll want within reach before the first cut.
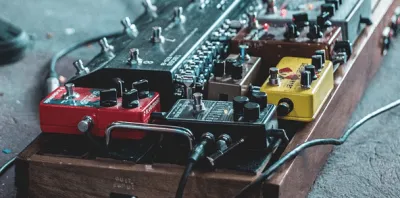
Important Tools You’ll Need
Before you make a single cut, line up the following tools. Each one plays a specific role in getting clean panels and a cabinet that holds together:
- Cordless drill/screwdriver
- Circular saw, table saw, or jig saw
- Miter box and a miter square (for cutting angles)
- Belt sander with sanding belts (for smoothing out edges and surfaces)
- Countersink (to sink screws below the surface of the wood)
Would you rather just buy a guitar speaker cab? We have a couple of different buyers guides - best speaker cab and 1x12 cabs.
Also check out our article on 1x12 speaker cabs.
Measurements and Materials Needed
Accurate measurements are the foundation of this whole project. Before cutting anything, measure the full exterior of the cabinet you’ve in mind so you know how much wood to buy and how to lay out your templates.
To get started, it helps to watch a build-along video alongside these written steps.
How to Make a Guitar Speaker Cabinet Step by Step
Work through the steps below in order. Each one builds on the last, so don’t skip ahead - dry-fitting panels and drilling pilot holes as you go will save you from cracked wood and loose joints later.
Step 1 - Cut the Exterior Parts
Measure the exterior of your speaker cabinet. This is to determine how much wood you need.
Also measure the entire outer edge of your speaker cabinet (all sides). These measurements will be used to make templates for the side panels and the top and bottom panels.
You’ll then need to cut 2 boards that are approximately 1/4” smaller than each of these measurements. Measure and mark these outer dimensions on the boards.
Step 2 - Cut the Interior Parts
You’ll need to cut 2 pieces of wood that’ll function like a frame for the speaker cabinet. Essentially, these boards will be cut into side and top panels.
Again, you’ll need to measure and mark these dimensions on your wood. Once you’ve marked them, use a circular saw or table saw to cut them out.
Step 3 - Assemble the Carcass
You’ll need to assemble the sides, top, and bottom panels of your guitar speaker cabinet. The speakers will be mounted into the side panels, so make sure you place them in position and screw them in.
In addition, you should drill pilot holes before you start driving any screws.
This is to ensure that your wood doesn’t split or crack.
Step 4 - Finish the Cabinet
Once you have the interior and exterior parts put together, all that’s left is to sand everything down, including the edges. If any edges are chipped or cracked, you can use a belt sander to make sure that everything is smooth.
To avoid splintering your wood, rub some wax onto the edges first.
Step 5 - Attach the Hardware
You’ll need to attach a wooden backplate to your cabinet. The hardware you use will depend on what type of speaker cabinet you’ve.
If you have an angled back, attach the plate by drilling screws into the bottom of each corner. This is to make sure that it’s secured and holds itself in place when you’re playing.
Step 6 - Assemble Front and Back Panels
You’ll now have to assemble the front and back panels. To do this, use wood glue for added structural integrity.
There should also be wooden dowels embedded into the front and back panels to keep them sturdy and able to hold up against high volumes of sound. One tip: avoid using glue in the center of the panel so that it can be removed if you ever need to replace your speaker in the future.
Step 7 - Add Support to the Cabinet
You should now add a supporting piece that’ll hold everything in place. This piece is important because it helps to ensure that your speaker cabinet doesn’t fall apart.
It also gives you a place to screw in speakers and other accessories. To make one, simply measure and cut another piece of wood to match the size of the interior.
Then glue and screw it in place using wood screws.
Step 8 - Pre-drill the Holes
Pre-drill holes in the center for the speaker and any other accessories. Use a countersink to make sure that the screws can’t be seen.
You should also pre-drill holes for attaching all of the exterior parts. Attach these with wood glue and a drill.
Keep in mind there are different types of speaker cabinets you can build aside from the one described here, each tuned to deliver acceptable levels of sound and volume.
Step 9 - Mount the Speaker
You’ll need to attach your guitar speaker into your cabinet using a screwdriver. This is one of the final steps before you can play guitar through it.
The speaker should be glued in as well so it doesn’t move around. Otherwise, you could find that your cabinet starts to come apart when you play, which is something to avoid for both the gear and your safety.
Should You Build or Buy a Cabinet?
Building your own cabinet is rewarding and lets you tune the dimensions to your exact speaker and tone, but it isn’t the right call for everyone. If you don’t already own a saw, drill, and belt sander, the tool cost alone can rival the price of a ready-made cab.
A DIY build also lives or dies on accurate measurements and solid bracing - get those wrong and the box will rattle or split under volume.
If you’d rather skip the workshop time, our buyers guides for the best guitar cabinets and 1x12 cabs cover proven options, and our breakdown of 1x12 speaker cabs explains how the format affects your tone.
Frequently Asked Questions
How long does it take to build a guitar cabinet?
Plan on at least a full weekend if you’re comfortable with power tools, and longer if it’s your first build. Most of the time goes into careful measuring, cutting accurate panels, and letting wood glue cure fully before you load the cabinet with a speaker.
What wood is best for a guitar speaker cabinet?
Cabinet builders generally favor void-free plywood because it stays rigid and resonates well without adding excess weight. Solid pine and similar softwoods are easier to work with but can be heavier and more prone to splitting, which is why pilot holes matter so much.
Do I need to glue the speaker in place?
Yes. Screwing the speaker in is the primary fix, but a bit of glue keeps it from shifting under heavy volume.
A speaker that works loose can rattle, buzz, or even pull at the panel and start to separate the cabinet.
Can a beginner build a guitar speaker cabinet?
A patient beginner can absolutely do it, but accurate cuts and bracing are non-negotiable. If you’ve never used a circular saw or table saw, practice on scrap wood first and follow a build-along video so you understand each step before committing your real material.
Final Thoughts
Making a guitar speaker cabinet comes down to two things: precise measurements and patient assembly. If you cut your exterior and interior panels accurately, drill pilot holes, brace the box properly, and secure the speaker with both screws and glue, you’ll end up with a cabinet that stands up to real playing volume.
Take your time on the finishing and bracing steps in particular, since those are what separate a solid cab from one that rattles itself apart. Leaving the center of a panel unglued is a small detail that pays off later when it’s time to swap a speaker.
I hope this guide helped you out. If you’d rather buy than build, our best guitar cabinets guide is a good next stop.
As always, happy building.