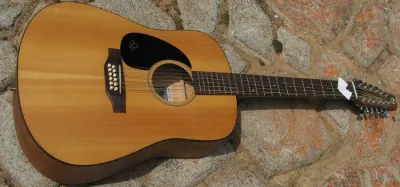
Your guitar’s strings are constantly trying to bend the neck forward. Something inside has to push back, and that something is the truss rod.
It’s a steel or carbon fiber bar buried the length of the neck, from the headstock into the body. Get it right and the action sits low and the strings play clean.
Get it wrong and you fight buzz or a bowed neck all day. This guide explains what the rod does and how to adjust it without harming the instrument, on both acoustic and electric guitars.
A small turn goes a long way here, so the basics matter. Let’s start with what a truss rod actually is.
What Is A Guitar Truss Rod?
A truss rod is an adjustable metal rod that runs through the neck of a guitar, binding the neck to the body. The purpose of a truss rod is to counteract any twisting or bending forces that are applied to the neck and body by strings or other objects on the guitar.
How Does A Truss Rod Work On A Guitar?
The truss rod can be tightened or loosened with an adjustment key or allen wrench. Tightening it’ll reduce the neck relief, while loosening it allows the strings to pull the neck forward.
The truss rod’s function is to ensure the neck doesn’t bow or develop an issue called a twisted guitar neck and that the guitar stays in tune. It’s very important for a guitar to have a properly functioning truss rod in order for it to stay in tune at all times and prevent fret buzz.
Many people think that the truss rod only directly affects the tuning of a guitar, but actually this isn’t so. In fact, it also influences playability and string action as part of a professional guitar setup.
How To Adjust A Truss Rod
Adjusting the truss rod will be easiest if you can remove the strings. I recommend using a string winder so that you can quickly remove and replace them.
It’ll make things a lot easier for you. Be sure to keep track of where each string goes, as putting them back in is easier if you mark them with tape or a marker where they go through the bridge.
-
Place your guitar on a table with the headstock facing upward.
-
Loosen the strings.
-
Adjust the truss rod. Turn it in to tighten and turn out to loosen.
You may need to do this several times so that you get a perfect adjustment, but even a fraction of a turn can cause problems later on. I’d recommend only turning it 1/4 turn at a time.
-
Check to see if the neck is straight by placing a level on it and making sure it’s horizontal. If not, repeat step 3 until you get a straight neck.
-
Loosen the strings again and lightly stretch them over the bridge of the guitar. The action of stretching will lower their pitch so that you can tune them to standard pitch again (or play with different tunings if you want).
-
Tighten all of the strings at once to tune the guitar. This will allow you to quickly and easily tune the entire instrument without any problems.
After you’ve made your adjustment, it’s important to make sure the neck is straight again by placing a level on it and making sure it’s horizontal. If not, repeat step 3 until you get a straight neck.
Related - how much tension can a guitar neck take? - how to check guitar neck bow
Which Way To Turn Truss Rod?
- Loosen - turn counter-clockwise
- Tighten - turn clockwise
There are two schools of thought about the direction in which you should turn the truss rod. People who adjust their neck relief before adding new strings tend to tighten the truss rod (turning clockwise as viewed from behind the headstock), while those who move to a lighter string gauge tend to back the truss rod off and loosen it (turning counter-clockwise, also as viewed from behind the headstock).
The simple rule: clockwise tightens and straightens the neck, counter-clockwise loosens and adds relief.
Frequently Asked Questions
Can I damage my guitar by adjusting the truss rod?
Yes, you can damage the neck if you force the rod or turn it too far at once. Make small adjustments, no more than a 1/4 turn at a time, and stop immediately if you feel hard resistance.
If the rod won’t budge or feels stuck, take the guitar to a qualified tech rather than risk stripping the nut or cracking the neck.
How often should I adjust my truss rod?
Most guitars only need an occasional tweak rather than regular adjustment. Seasonal changes in humidity and temperature, or a switch in string gauge, are the usual reasons the neck moves enough to need attention.
Check the neck relief whenever you notice fret buzz or rising action, and adjust only if the neck has actually shifted.
Do all guitars have a truss rod?
Most modern steel-string acoustic and electric guitars have an adjustable truss rod, but not all instruments do. Many classical and nylon-string guitars use a thicker neck or a non-adjustable reinforcement bar instead, because nylon strings put far less tension on the neck.
If you’re unsure, look for an adjustment nut at the headstock or where the neck meets the body.
Which way do I turn the truss rod to fix fret buzz?
The direction follows the bow, so check what’s causing the buzz first. If the neck is bowed forward and the action feels high, tighten the rod clockwise to straighten it.
If the neck is back-bowed and the strings buzz with low action, loosen the rod counter-clockwise to add a little relief.
Make the change in small steps, retune, and recheck the relief before turning the rod any further.
Final Thoughts
The truss rod is one of the most important parts of your guitar, and understanding it takes a lot of the mystery out of keeping the neck straight and the action comfortable. It works by counteracting the constant pull of the strings, and a small turn in the right direction can clear up fret buzz and high action.
Work slowly, turn no more than a 1/4 turn at a time, and recheck the neck after every adjustment. If the rod ever feels stuck or you aren’t confident, a quick visit to a tech is cheaper than a damaged neck.
Get the truss rod dialed in and the rest of your setup becomes far easier to manage.