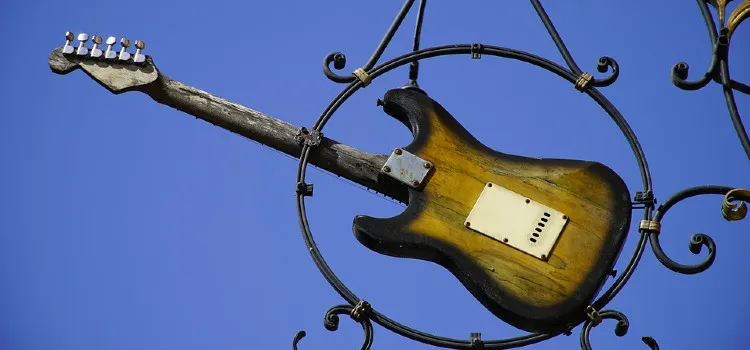
You want your Stratocaster to look like it has played a thousand gigs, not sat in a glass case. Relicing gets you there by deliberately aging the finish, the metal, and the plastic.
Here’s the honest warning. This work runs one way, and a heavy hand can wreck a finish in seconds, so on a guitar you truly love, hire a pro or buy a Super Strat that’s already road worn.
If you’d rather try it yourself, this guide takes the guitar apart piece by piece. You’ll cover the body, neck, headstock, bridge and metal hardware, and pickguard, plus the tools and the slip-ups that ruin a relic.
Before any of that, it’s worth asking whether you should relic your own Strat at all.
Should You Relic Your Own Strat?
Relicing is permanent. Once you’ve checked a finish, dulled a logo, or oxidized a set of screws, there’s no undo button.
That makes the first decision the most important one: is this a guitar you can afford to experiment on?
A reliced look that reads as authentic is harder to pull off than it appears. Real wear follows the logic of how a guitar is actually held and played.
The forearm contour wears before the back, the area behind the neck near the first few frets wears before the upper register, and belt-buckle rash shows up on the back rather than the face. Random damage scattered across the body almost always looks fake.
For a player who just wants the aesthetic without the risk, buying a factory-aged model or a guitar that’s genuinely worn from years of use is the safer route. If you’re set on the DIY path, treat your first attempt as practice on a cheap body, not on your main instrument.
What You Need Before You Start
You don’t need a full luthier’s bench to relic a Strat, but a handful of items make the work cleaner and more controllable. Most are cheap and available at any hardware store.
- Fine and medium sandpaper (320 to 800 grit) and 0000-grade steel wool
- A heat source for finish checking (a freezer plus a heat gun or hair dryer, used carefully)
- A small razor blade or hobby knife for fine cracks and edge wear
- Keys, coins, or a small chain for adding realistic dings and chips
- Mild household chemicals for oxidizing metal, such as vinegar, salt, and steel-wool slurry
- Dark wax, tea, coffee, or amber tint for adding grime and yellowing
- Masking tape, nitrile gloves, eye protection, and a respirator or dust mask
- A scrap piece of finished wood or an old pickguard for testing every technique first
The single most useful habit is to test on scrap before touching the guitar. Finishes, plastics, and platings react differently from one brand to the next, and a five-minute test can save you from an irreversible mistake.
How to Relic a Strat Body
The body is where relicing has the biggest visual payoff and the highest risk. Start with the finish type, because it dictates everything.
Nitrocellulose lacquer ages naturally and checks, chips, and wears in a way that looks correct. Modern polyurethane and polyester finishes are thick and stubborn, and they tend to chip in large white flakes rather than the fine cracks you want.
Begin with finish checking, the fine spiderweb of cracks that forms as old lacquer contracts. The classic method is thermal shock: chill the guitar in a freezer for several hours, then warm the surface quickly with a heat gun or hair dryer held at a distance.
The rapid temperature swing makes nitro contract and craze. Work in small areas and stop the moment you see cracks form, because too much heat will bubble or melt the finish.
Next, add wear at the contact points. Lightly sand the forearm contour, the area where your picking hand rests, and the back where a belt buckle would rub.
Use progressively finer grits and feather the edges so the bare wood transitions smoothly into the finish rather than ending in a hard line. On a real guitar, finish wears thin and translucent before it disappears entirely, so aim for that gradient instead of a sharp boundary.
For dings and chips, gently tap the body with keys, a coin, or a short length of chain. Concentrate on edges, the lower bout, and anywhere a guitar would knock against a stand or strap hardware.
Keep the damage plausible and sparse. A few well-placed dings read as decades of careful ownership, while dozens of random gouges read as abuse.
Finish by rubbing dark wax, thinned stain, or a tea-and-coffee wash into the cracks and worn areas to mimic accumulated grime, then buff lightly. If you want to take a full repaint and aging project even further, our guide on how to paint a guitar covers prepping and refinishing a body from the ground up.
How to Relic a Strat Neck
A genuinely worn neck is often what sells a relic, because it’s the part a player’s hand contacts constantly. The goal is a smooth, satin, slightly grimy feel rather than visible damage.
Glossy maple necks especially benefit, since decades of playing knock the shine off the back and leave a worn-in matte surface.
Knock down the gloss on the back of the neck with 0000 steel wool, working in long strokes along the length. Concentrate on the first few frets and the area around the neck pocket, which see the most thumb contact, and ease off toward the higher positions so the wear is graduated.
The back of the neck should feel like it’s been played for years, not uniformly scuffed end to end.
For maple fingerboards, light wear and a darkened, dirty look around the most-used frets is convincing. You can add a subtle amber tint or rub in a little grime, but go easy near the frets and avoid anything that affects playability.
If your neck has lacquer, you can apply light checking with the same heat method used on the body, though necks are smaller and more delicate, so use less heat and stop early.
Don’t sand into the fingerboard wood itself or round over the fret ends aggressively. The aim is the look and feel of honest wear, not structural changes.
If a project neck is in genuinely rough shape and needs work beyond cosmetics, that’s a different job. Understanding why guitar necks are so expensive is a good reminder to practice on something inexpensive first.
How to Relic a Strat Headstock
The headstock ties the whole relic together, and the logo is the focal point. A crisp, glossy decal on an otherwise heavily aged guitar instantly breaks the illusion.
The standard approach is to dull the finish over the logo and let the decal soften behind aged lacquer rather than removing it.
Lightly buff the headstock face with fine steel wool to take the gloss off and slightly mute the logo, working carefully so you don’t scrub through the decal. Apply the same finish-checking technique used on the body if the headstock is lacquered, since real headstocks crack just like bodies do.
Add a small amount of amber tint or grime wash to warm up the white and yellow of an old waterslide logo.
The string tree, nut area, and the edges of the headstock pick up dings and finish wear over time, so a few gentle touches there add realism. Keep the tuner posts and string holes clean, because wear belongs to the finish and hardware, not to the functional surfaces.
How to Relic a Strat Bridge and Other Metal Parts
Aging metal is one of the most satisfying parts of the process, and it’s largely reversible compared with finish work, since hardware can be swapped if you overdo it. The targets are the bridge plate and saddles, the tremolo block and arm, the tuner housings, screws, the jack plate, and the string ferrules or string tree.
Remove the parts you plan to age so chemicals never touch the body or finish. The most common method is to expose the metal to a mild acid and oxidizer.
A bath or repeated wipes with vinegar and salt, or a slurry made from steel wool dissolved in vinegar, will gradually dull chrome and nickel and bring up a tarnished, oxidized patina. Time and humidity do the rest, so check the parts frequently and pull them when the color looks right.
For lighter wear, simply scuff plated parts with fine steel wool or a scouring pad to cut the mirror shine and add fine surface scratches. Concentrate on the high spots a hand or pick would rub, such as the leading edge of the bridge plate and the tops of the saddles.
Screw heads and the jack plate respond well to a quick dulling and a touch of oxidation.
After aging, rinse and dry the metal thoroughly, then reassemble. Use a little protective wax or oil if you want to slow further corrosion.
If you want to understand how the hardware you’re aging actually functions before you pull it apart, our overview of electric guitar bridge types explains how the tremolo and saddles work together.
How to Relic a Strat Pickguard
A bright white, glossy pickguard is a dead giveaway on an otherwise aged Strat. Old plastics yellow, lose their shine, and pick up swirl marks and pick scratches around the strings and the pickup cutouts.
Reproducing that softens the contrast and finishes the look.
Knock the gloss off the surface with fine steel wool or very fine sandpaper, working in small circles and along the natural paths a pick would travel. The area between the bridge pickup and the bridge, where strumming happens, should show the most wear.
Add a few finer scratches by hand to mimic years of pick contact.
To yellow a white pickguard, a long soak in strong tea or coffee, or careful exposure to UV light, can warm the color toward aged cream. Results vary a lot by plastic type and brand, which is exactly why you should test on an old or spare guard first.
Mint-green reproduction guards already carry an aged tint, so they may only need scuffing rather than coloring.
Reinstall the guard with lightly aged screws to match the rest of the hardware. If your project is a budget instrument and you’re aging it as part of a broader upgrade, our Squier Strat upgrades guide covers other improvements worth making at the same time.
Frequently Asked Questions
Is relicing bad for a guitar?
Done carefully, cosmetic relicing doesn’t harm how a guitar plays. Worn finish, dulled hardware, and a yellowed pickguard are surface changes.
The danger comes from a heavy hand: too much heat can bubble a finish, aggressive sanding can reach the wood, and harsh chemicals can damage parts you didn’t intend to age. Go slowly, test first, and keep wear away from functional surfaces like the fingerboard and tuner posts.
Does relicing lower a guitar’s value?
For most production Strats, a tasteful relic is a wash or even a plus among players who like the aesthetic. But relicing a clean, collectible, or vintage instrument almost always lowers its value, because originality matters to collectors.
Reserve DIY relicing for inexpensive or already-worn guitars, and never age something rare or sentimental on a whim.
Can you relic a poly finish like nitro?
Not in the same way. Polyurethane and polyester finishes are thick and flexible, so they resist the fine checking that makes nitrocellulose look authentically old.
You can still wear poly at contact points and add dings, but it tends to chip in large flakes rather than crack in a spiderweb pattern. Guitars with nitro finishes are far easier to relic convincingly.
What guitar should I practice relicing on?
Use the cheapest finished body or neck you can find, or an old project guitar you don’t mind ruining. A budget Squier-style instrument or a spare part is ideal for learning how a finish checks and how metal oxidizes.
Building those reps on something disposable means your first mistakes don’t land on a guitar you love.
Final Thoughts
Relicing a Strat is a process of small, deliberate steps, body, neck, headstock, hardware, and pickguard, each aged to match how a real guitar wears over years of playing. The techniques themselves are simple, but the difference between a believable relic and an obvious fake comes down to restraint and placement.
Wear that follows how the instrument is actually held will always look more convincing than damage scattered at random.
Work in stages, test every technique on scrap first, and step back often to judge the whole guitar rather than one isolated area. Metal and plastic parts are forgiving because they can be swapped, but finish work is permanent, so commit to body and neck changes only after you’re confident.
If after reading this you’d rather not gamble on a finish you can’t undo, there’s no shame in having a professional relic the guitar or simply buying one that’s already road worn.
Either way, the look you’re after is achievable. The question is just how much risk you want to take to get there.