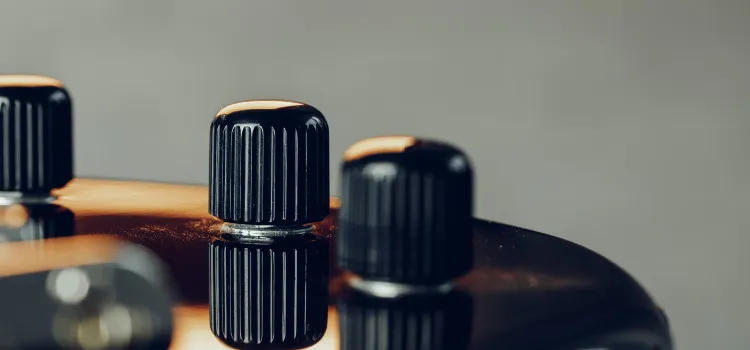
You roll your volume knob and hear an ugly crackle through the amp. The blue and yellow can of WD40 is right there on the bench, and it has bailed you out of a hundred squeaks since the 1940s.
A scratchy pot feels like just another stuck hinge. It isn’t, because that knob is a small piece of electronics, and the spray that frees a rusty bolt is the wrong friend here.
Grab it and you’ll usually trade a short-term fix for a worse problem down the line. A cheaper, better fix exists instead.
This guide explains why and walks you through cleaning your controls the right way. Let’s start with whether WD40 belongs on guitar pots at all.
Can You Use WD40 on Guitar Pots?
No. I wouldn’t recommend using WD40 to clean guitar pots or any other guitar electronics.
WD40 contains a mixture of solvents and other chemicals, and some of those ingredients actually attract dirt and dust.
That’s the number one reason to keep it away from your pots: it can leave them worse off than before.
The good news is that the real fix is cheap, easy, and takes only a few minutes with the right product.
Why WD40 Is the Wrong Choice
The original WD40 is designed to displace water and free up stuck metal parts. Inside that formula are solvents and a light oil that stays behind as a film once the solvent evaporates.
On a door hinge that film is helpful. Inside a potentiometer it’s a problem.
The oily residue collects dust and grime, and that buildup is exactly what makes a pot sound scratchy in the first place. Spray WD40 in there and you may get a few quiet weeks before the noise returns louder than ever.
A dedicated electrical contact cleaner does the opposite. It dissolves and flushes out the dirt, then evaporates cleanly without leaving a residue behind.
That’s why it’s the standard choice for cleaning pots, switches, and jacks.
Before You Start: Are Your Pots Actually Dirty?
This is easy to find out. First, plug your guitar into your amp like you’re going to start playing.
Now turn your volume and tone knobs up and down. Is it quiet, where you only hear the guitar, or does it sound scratchy as you turn the knobs?
If you hear a static-like, scratchy sound, your pots need cleaning.
Related - are volume and tone potentiometers the same?
How to Clean Scratchy Guitar Pots Properly
A scratchy volume pot is one of the most common guitar issues, and it’s usually caused by dirt and grime that has built up inside the pot. Cleaning your volume and tone pots now and then helps you avoid a lot of unnecessary guitar problems down the road.
What You Will Need
This is a very easy job, but there are a couple of things you’ll need first:
- Screwdriver - for accessing the pots.
- Spray contact cleaner - there are several electrical contact cleaner options out there, but my favorite is DeoxIT D5 Spray Contact Cleaner, which you can find on Amazon. One can lasts a long time, and you can use it on other electrical components too, like your guitar amp, which can develop scratchy pots as well. It’s an excellent pot cleaner. Isopropyl alcohol is an option too, but I prefer the control you get with a contact cleaner spray.
Step 1 - Access the Guitar’s Pots
The first thing to do is find the pots on your guitar. This depends on the type of electric guitar you’ve, but there are really only two ways to reach them.
If your guitar has a pickguard like a Fender Stratocaster, you can pull the pickguard off. You’ll see the pots connected to the underside of the pickguard along with the pickups.
If you don’t have a pickguard, like on a Les Paul, the pots and other electronic components are accessed by removing a panel from the back of the guitar. Look for a plastic cover on the back of the body, roughly behind where the knobs sit on the front.
Take that cover off with a screwdriver.
Step 2 - Spray the Contact Cleaner Into the Pot
Spray a little contact cleaner into the opening on the pot. One or two quick sprays is plenty.
You want enough that it won’t evaporate instantly, but not so much that it overflows and drips onto your guitar and the surrounding electronics.
While you’re at it, give the pickup selector switch a couple of sprays as well, since it can get scratchy for the same reason.
Step 3 - Distribute the Contact Cleaner
Once you’ve sprayed the pot, give the volume and tone controls a few full turns to work the cleaner through the entire range of the pot.
Most contact cleaners come with an extension tube, that little straw-like attachment, to help you aim the spray. I recommend using it for better accuracy.
Repeat this for each pot you want to clean. Try not to get too much cleaner around the outside of the pots, but if you do, wiping it off with a dry cloth is fine.
If you’re nervous about getting cleaner on your guitar, you can wear gloves while you work. It’s up to you, but if anything does end up on the finish, wipe it off thoroughly with a dry cloth.
Step 4 - Check to See If It Worked
Turn the pots up and down again to confirm the scratching is gone. If it’s quiet and all you hear is the guitar itself, your tone and volume pots are clean and you’re done.
If the pots still sound scratchy, repeat the process. If you’ve tried a few times and still have issues, read on.
Help, I Cleaned My Pots But They Still Sound Bad
Contact cleaner won’t fix everything. If a pot is completely worn out, you may need to replace it or have a guitar repair shop take a look.
Can Guitar Pots Go Bad?
Yes, guitar pots can go bad and degrade over time. Even the best guitar pots eventually develop a scratchiness that can’t be cleaned out, and at that point the only fix is a new pot.
If you hear a loud crunching sound when you turn the volume knob, that often points to a burnt-out pot or another electrical issue with your guitar. When cleaning doesn’t solve the problem, the best move is to install new pots.
How to Tell If a Guitar Pot Has Gone Bad
It’s simple. If you cleaned the pot using the method above a few times and it still hasn’t fixed the scratchy noise, you have a bad pot, and it’ll need to be replaced.
A new pot is inexpensive, and swapping one in is a manageable job if you can solder. If soldering isn’t your thing, any guitar tech can replace it quickly.
Frequently Asked Questions
Is WD40 Specialist Contact Cleaner safe for guitar pots?
WD40 sells a separate “Specialist Contact Cleaner” that, unlike the original blue-and-yellow can, is designed to evaporate cleanly without leaving a residue. That type of product is much closer to what you want for electronics.
The thing to avoid is the standard WD40 multi-use lubricant. If a can specifically says “contact cleaner” and “dries fast, no residue,” it’s in the right category, but a purpose-made guitar contact cleaner is still the safest pick.
Can I use isopropyl alcohol instead of contact cleaner?
Isopropyl alcohol can work in a pinch since it evaporates without leaving residue. Use a high-purity grade, ideally 90 percent or higher, so you aren’t introducing water into the pot.
That said, a contact cleaner spray with an extension tube gives you far better control and reaches inside the pot more effectively, so it’s the tool I reach for first.
How often should I clean my guitar pots?
There’s no fixed schedule. Clean them when you start to hear scratchiness while turning the knobs, which for most players is every year or two depending on how much you play and the environment the guitar lives in.
Cleaning the pots before problems start is a good habit and can help you avoid bigger issues down the road.
Will contact cleaner damage my guitar’s finish?
A quick splash of contact cleaner wiped off promptly is generally fine, but you shouldn’t let it sit on a finished surface. Aim the spray into the pot, use the extension tube, and keep a dry cloth handy to wipe up any overspray.
If you want extra peace of mind, lay a cloth over the body around the control cavity or wear gloves while you work.
Final Thoughts
If you want to get the most out of your guitar, keep your pots clean. A dirty pot can restrict the signal and add unwanted noise like static and scratching, and reaching for WD40 only makes that worse by leaving a residue that attracts more dirt.
Skip the WD40 and use a proper electrical contact cleaner instead. A few quick sprays, a few turns of the knob, and most scratchy pots come right back to life.
Clean your pots at the first sign of trouble, and if a pot is truly worn out, replace it. Either way, you’ll spend less time fighting noise and more time playing.