You notice the bridge on your acoustic starting to lift at one edge, or a hairline crack creeping across it. Suddenly the whole guitar feels like it’s on borrowed time.
It isn’t. A failing bridge can be removed and replaced, and among structural jobs this one is fairly forgiving for a luthier.
That small piece of wood does far more than hold your strings down, though. Once you see everything it controls, the repair makes a lot more sense.
This guide covers the warning signs and the full replacement process. First, let’s look at what the bridge actually does.
What the Bridge Actually Does
Holding the strings in the body is only the start. The bridge also sets the spacing of the strings, and even a tiny change in that spacing can change how the whole instrument feels under your hands.
More important than spacing is intonation. The position and angle of the saddle slot in the bridge is what makes accurate tuning possible.
Depending on where the bridge and saddle sit, a guitar can have ideal intonation or be nearly impossible to tune properly across the neck.
The bridge also helps set the action, or the height of the strings. The saddle drops into the saddle slot of the bridge, and that saddle is what determines string height.
There’s a three-step process you can use to set the action on the best acoustic guitars, and the same method lowers action on most instruments.
Finally, the bridge is a brace. Most acoustic braces live inside the instrument as part of the acoustic guitar design, so players rarely think of the bridge as a brace at all.
Internal braces support the body against string tension, and the bridge does the same job on the outside of the top.
Can You Replace the Bridge on an Acoustic Guitar?
Yes. Replacing an acoustic guitar bridge can absolutely be done, and it’s a fairly straightforward guitar repair.
Because of mishandling, normal wear, or a bad setup, there are several issues that lead to needing a new bridge. Here are the four most common.
Warping
A bridge that has been loose for an extended period can become distorted. If there’s significant twisting, replacement is necessary.
A small amount of warp can sometimes be repaired by heating and clamping the bridge, or by planing the bottom flat if the bridge is thick enough to allow it.
Cracks
Cracks usually appear in two places: at the edge of the saddle slot and through the bridge pin holes. Minor cracking through the pin holes can sometimes be repaired when nothing else is wrong with the bridge.
Cracks at the saddle edge are a different story, and repairing them is generally unwise because of the constant string tension pulling on that area.
Thinned or Modified Bridge
On inexpensive instruments, a neck reset is a pricey repair. To lower action on a guitar that really needs a neck reset, the bridge is sometimes thinned or modified instead, since the saddle is already sitting low.
If that guitar later gets a proper neck reset after the bridge has been thinned, it’s smart to replace the bridge so it returns to an accurate height.
Incorrect Saddle Placement
Intonation problems caused by the wrong placement of the bridge or saddle often can’t be corrected through repair alone. Fixing the issue may require a full bridge replacement so the saddle can sit in the correct spot.
If you ever plan to install a pickup, this is also a convenient time to handle that work while the bridge area is exposed.
How to Replace an Acoustic Guitar Bridge
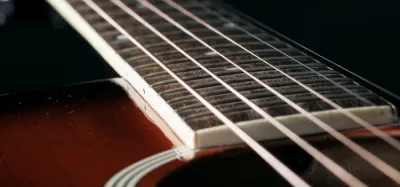
If the bridge is cracked or loose, it has to come off the body to be reglued or replaced. To check for a loose bridge, look at the back edge: a gap between the bridge and the body means it has lifted.
The gap is often too small to see, so slide a piece of paper into the seam. If the bridge is properly attached, the paper shouldn’t slip underneath it.
Once you’ve confirmed the bridge needs to come off, follow these steps:
- Trace and protect. Lay card stock paper over the bridge, trace its outline, and cut out the shape. Place that paper template around the bridge during removal to protect the surrounding finish.
- Mark the center line. Measure and mark the center line of the bridge on both the top face and the bottom. This lets you line the bridge center up with the center line of the guitar body when you reinstall it.
- Use the existing pin holes. This isn’t the first time a bridge has been glued to this guitar, so the bridge pin holes are already drilled in the top. Place wooden dowels in the first and last string holes to position the new bridge exactly where the old one sat.
Drill the dowels out once the bridge is glued down. 4. Do a dry run. With the body and bridge thoroughly cleaned, clamp them together with no glue. Any time something important is being glued to a guitar, a dry run is smart, because it confirms the clamps, cauls, and clamping plan all fit correctly. 5. Apply the glue. After a successful dry run, apply the glue. Most glue joints call for a sparing amount, but the bridge is an exception.
It must be attached securely to the body, so don’t be stingy here. 6. Clean up and clamp overnight. Wipe off the excess immediately with a damp cloth or paper towel so it can’t harden and ruin the finish. For best results, leave the bridge clamped and let it set overnight.
Frequently Asked Questions
How much does it cost to replace an acoustic guitar bridge?
Cost depends heavily on whether you do the work yourself or hire a luthier, and on the materials involved. A professional bridge replacement is more involved than a simple setup, so it sits well above the price of routine maintenance.
A new bridge blank itself is relatively inexpensive, but the labor of removing the old one cleanly, fitting the new one, and regluing it’s where most of the cost lives.
Can I replace a guitar bridge myself?
It’s doable for a patient, handy player, since the basic process is straightforward: confirm the bridge is loose or damaged, remove it, line up the replacement, and glue it down. The hard part is doing it cleanly without damaging the finish or the top.
If the guitar is valuable or the saddle placement affects intonation, having a luthier handle it’s the safer choice. A bridge that’s glued even slightly out of position can hurt tuning across the entire neck.
What glue is used for an acoustic guitar bridge?
The bridge is one joint where you apply glue generously rather than sparingly, because it must hold securely against constant string tension. Whatever adhesive you choose, the key is full coverage and firm overnight clamping so the bond fully cures.
Clean both surfaces thoroughly before gluing, and wipe away any squeeze-out immediately so it doesn’t harden on the finish.
How do I know if my bridge is lifting?
Look at the back edge of the bridge where it meets the body. A visible gap means the bridge is lifting, but the gap is often too small to spot by eye.
The reliable test is to slide a thin piece of paper into the seam. If the paper slips underneath the bridge, it has come loose and needs to be reglued before the problem gets worse.
Final Thoughts
The bridge is small, but it carries a lot of responsibility: string spacing, intonation, action, and structural bracing all run through it. When it warps, cracks, lifts, or sits in the wrong spot, the rest of the guitar can never play its best.
Replacing it’s very achievable. The job comes down to confirming the problem, removing the old bridge without harming the finish, lining the new one up with dowels and a center line, and gluing it down securely after a dry run.
If you’re comfortable with careful handwork, this is a satisfying repair to take on. If the guitar is precious or the intonation is on the line, hand it to a trusted luthier and let the work be done right the first time.