Maybe your current neck is warped, or maybe you just want a different feel under your hand. On most popular electrics, you can swap the neck yourself because it’s held on with metal screws, not glue.
That one detail changes everything. A bolt-on neck is far simpler to replace than a glued-in set neck, and a few common tools save you a trip to the tech.
This guide explains what a bolt-on neck is and why you’d replace one, then walks the full job from start to finish. You’ll remove the old neck, fit the new one into the pocket, and dial in the setup so it plays right.
First, let’s be clear on what a bolt-on neck actually is.
Also read - fixing a warped guitar neck - bolt-on neck vs set neck - common guitar neck shape options - checking for a bowed neck - guitar headstock repair
What a Bolt-On Neck Actually Is
A bolt-on neck is fastened to the guitar body through a routed recess called the neck pocket, secured by four or five screws that pass through a metal neck plate on the back of the body. Despite the name, true bolts are rarely used - the “bolts” are usually wood screws threaded directly into the heel of the neck.
This construction was popularized by mass-produced solid-body electrics and remains the standard on countless Stratocaster- and Telecaster-style instruments. Because the joint relies on mechanical fasteners instead of adhesive, the neck can be removed and reinstalled repeatedly without damaging the body, which is exactly why this repair is realistic for a home player.
If you’re unsure which type of joint your guitar has, compare the differences between a bolt-on neck and a set neck before you start. A set neck is glued in place and isn’t a DIY swap.
Why You Might Replace a Bolt-On Neck
There are several legitimate reasons to replace rather than repair a neck. The most common is irreparable damage - a neck that has twisted, badly warped, or cracked beyond what a truss rod adjustment can correct.
If you’ve already worked through why guitar necks warp and how to check for a bowed neck and the wood won’t come back true, a replacement is often the practical choice.
Players also swap necks to change the feel of the instrument. Moving to a different neck profile shape, a different fretboard radius, or a different fret size can transform how a guitar plays without buying a whole new instrument.
Others upgrade from a worn factory neck to a higher-quality one, or change the headstock style for aesthetic reasons.
Whatever the motivation, the core process is the same. The key requirement is that the replacement neck matches your guitar’s neck pocket dimensions and mounting pattern.
Tools and Materials You’ll Need
You don’t need a professional workbench to do this job, but having the right items on hand makes it go smoothly and protects the finish:
- The replacement neck (sized to fit your existing neck pocket)
- A correctly sized Phillips or hex screwdriver for the neck plate screws
- A string winder and wire cutters for removing the strings
- A clean, padded work surface or a neck/body support cushion
- A capo or rolled towel to support the neck during work
- A 6-inch ruler or feeler gauges for the setup afterward
- A guitar tuner
- Optional: a small amount of pencil graphite or appropriate lubricant for the nut slots
Take a moment to confirm the replacement neck is a genuine match for your body. The pocket width, heel shape, and screw-hole spacing all need to line up.
Forcing a mismatched neck is the fastest way to ruin both parts.
How to Remove the Old Neck
Work slowly here. Most of the risk in this repair is concentrated in the removal step, where a slipped screwdriver can gouge the body finish.
Detune the strings until they’re slack, then remove them completely with a string winder and cutters. Lay the guitar face-down on a padded surface so the back of the body and the neck plate face up, and support the neck so it isn’t hanging unsupported.
Locate the neck plate on the back of the body and remove the screws one at a time, loosening them in stages rather than fully backing out one before the next. Keep the screws somewhere safe - you may want to reuse them.
Once all the screws are out, gently lift the neck straight up and out of the pocket. It may be a snug fit, so wiggle it carefully rather than prying, and never use a tool to lever it free, as that’ll damage the pocket edges.
Set the old neck aside.
How to Install the New Neck
With the body clear, dry-fit the replacement neck into the pocket first to confirm it seats fully and squarely. A good neck pocket fit is firm with no side-to-side play and no gaps at the heel.
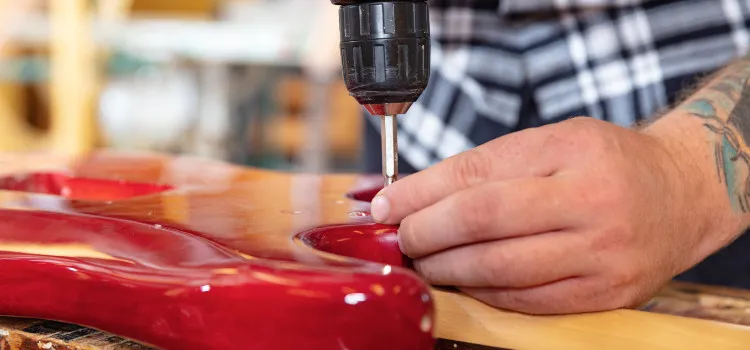
Seat the new neck and hold it in place while you align the screw holes with the holes in the neck plate. If the replacement neck has no pre-drilled holes, mark and drill pilot holes carefully to match the body before driving any screws - skipping pilot holes risks splitting the heel.
Drive the screws in gradually, working in a crisscross pattern and tightening each one a little at a time so the neck pulls down evenly into the pocket. Snug them firmly, but stop as soon as they’re seated, because overtightening can strip the threads in the wood or crack the heel.
When the neck is secured, give the joint a gentle check for movement. A properly installed bolt-on neck should feel completely solid with no flex at the heel.
How to Set Up the Guitar Afterward
A new neck almost always needs a fresh setup, because the relief, action, and intonation from the old neck won’t carry over. Restring the guitar and bring it up to pitch with your tuner, then let the neck settle under string tension for a few minutes.
Check the neck relief by holding a string down at the first and last frets and looking at the gap near the middle of the neck. Adjust the truss rod in small increments to dial in a slight, even amount of relief.
If you’re new to reading neck straightness, the method in how to check guitar neck bow applies directly here.
Set the string action at the bridge saddles to a comfortable height, then set the intonation by comparing the open string pitch to the note at the 12th fret and adjusting saddle position until they match. Finally, tune up and play through the whole neck to confirm there are no buzzes, dead spots, or fretting-out, making minor adjustments as needed.
Watch It Done on Video
A bolt-on neck swap is much easier to follow visually than to read through, so it helps to watch the full process before you pick up a screwdriver. Seeing how the neck lifts out, how the screws thread back in, and how the setup is dialed in afterward will make every step above click into place.
If you’ve combined this job with a separate repair, such as a broken guitar headstock, watch that process demonstrated too before deciding how much you want to take on yourself.
Common Mistakes to Avoid
A few avoidable errors account for most botched neck swaps:
- Forcing a mismatched neck. If the heel won’t drop into the pocket cleanly, the dimensions are wrong. Don’t sand or jam it in.
- Skipping pilot holes. Driving screws into an undrilled heel can split the wood. Always pilot-drill when holes aren’t pre-made.
- Overtightening the screws. Snug is enough. Cranking the screws strips the threads in the wood and can crack the heel.
- Prying the old neck out. Levering with a screwdriver gouges the neck pocket. Lift and wiggle straight up instead.
- Skipping the setup. A new neck needs fresh relief, action, and intonation. Bolting it on and playing immediately almost always leaves buzzes or high action.
Frequently Asked Questions
Can I put any neck on any bolt-on body?
No. The replacement neck has to match your body’s neck pocket width, heel shape, and screw-hole spacing.
Many Stratocaster- and Telecaster-style necks share common dimensions, but there are exceptions, so always confirm the measurements before buying.
A neck that doesn’t fit the pocket correctly will never play in tune or feel solid.
Do I need to remove the strings completely?
Yes. To take the neck off you’ve to clear the neck plate and lift the neck out of the pocket, which isn’t possible with strings still attached.
Detune them fully first, then cut and remove them. Plan to install a fresh set when you reinstall the neck.
Should I use the old screws or buy new ones?
You can reuse the original screws if they’re in good shape and the threads aren’t stripped. If any screw turns without biting or shows damaged threads, replace it with a correctly sized equivalent.
Mismatched or stripped screws won’t pull the neck down tightly into the pocket.
Will replacing the neck change my guitar’s tone?
It can, subtly. The neck wood, profile, and how tightly the joint seats all influence feel and, to a lesser degree, tone and sustain.
The bigger and more noticeable change is in playability - a different profile, radius, or fret size changes how the guitar feels under your hands far more than most players expect.
Final Thoughts
Replacing a bolt-on guitar neck is one of the few major guitar repairs that’s genuinely within reach for a careful home player. Because the joint is mechanical rather than glued, the whole job comes down to removing a handful of screws, fitting a properly matched neck, and reinstalling those screws evenly - followed by a patient setup.
The two things that separate a clean swap from a frustrating one are fit and finish work. Make sure the replacement neck actually matches your pocket before you start, and don’t rush the truss rod, action, and intonation at the end.
That setup is what turns a bolted-together guitar back into a playable instrument.
If you reached this point because your current neck is damaged, it’s worth confirming the diagnosis first. Walk back through why guitar necks warp and the differences between neck types so you’re certain a full replacement is the right call rather than a simpler adjustment.